Wiring tower speakers is easier than it looks. You don’t need special training — just the right cable, a couple of simple tools and attention to polarity. This updated guide walks through the process step by step, including safety checks we’ve added since the original version.
What you need
- Speaker wire (two lengths, one per speaker).
- Wire cutters and a wire stripper.
- Tape measure.
- Optional: banana plugs for tidier, more secure connections.
- Optional: a sound level meter app to balance levels afterward.
14-gauge copper speaker wire with an in-wall-rated (CL2) jacket — plenty for typical home runs.
Step 1: Power everything off
Turn off and unplug the amplifier or receiver before connecting or disconnecting speaker wires. A short circuit while the amp is on can damage it.
Step 2: Plan placement and measure
Position the speakers first (see our placement checklist), then measure the route from amplifier to each speaker, adding a little slack. Try to keep both runs similar in length for neatness — small differences don’t affect sound.
Step 3: Choose the right gauge
Lower AWG numbers mean thicker wire. As a rule of thumb, 16 AWG suits runs up to roughly 25–50 feet with typical 8-ohm speakers; use 14 AWG for longer runs or lower-impedance (4-ohm) speakers. Expensive “audiophile” cable isn’t necessary for good results.
Step 4: Strip and identify polarity
Strip about ½ inch of insulation from each conductor and twist the strands tight. Speaker wire marks one conductor — with a stripe, ridge, printing or different color. Use that marked conductor as positive (+) at both ends.
Step 5: Connect the speakers
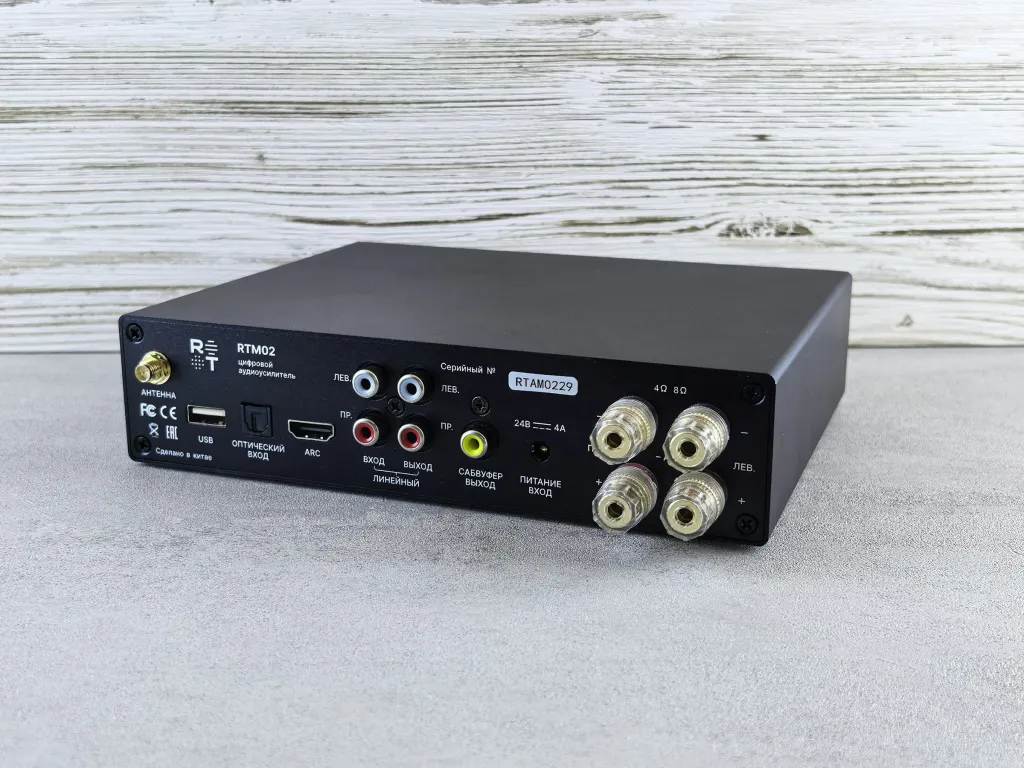
- Connect + on the amplifier’s left channel to + on the left speaker, and – to –. Repeat for the right.
- One speaker per channel. Never connect two speakers to one channel unless your amplifier’s manual explicitly allows the resulting load.
- Tighten binding posts firmly, or use banana plugs.
- Check that no stray strands touch the other terminal.
Gold-plated locking banana plugs for tidy, secure speaker connections.
Step 6: Bi-wire terminals (if your speakers have them)
Many towers have two pairs of terminals joined by metal jumpers. For a normal connection, leave the jumpers in place and connect to one pair. Bi-wiring (separate cables to each pair from the same amp channel) and bi-amping (separate amp channels) are options, but benefits are debated and bi-amping requires removing the jumpers and a compatible receiver. Follow your speaker and receiver manuals.
Step 7: Power on and check
Turn on at low volume and play something with a clear center vocal. If the voice sounds vague and bass thin, one speaker is probably wired out of phase — swap + and – on that speaker only. Then set levels and run your receiver’s room correction if it has one.
Frequently asked questions
Does speaker wire polarity matter?
Yes. If one speaker is wired backwards, the two speakers work against each other, especially in the bass, and the center image becomes vague. Keep + to + and – to – at both ends.
What gauge wire do I need for tower speakers?
16 AWG is fine for most short runs; choose 14 AWG for longer runs or 4-ohm speakers. Very long runs may justify 12 AWG.
Do I need banana plugs?
No, bare wire works fine when tightened properly. Banana plugs make connections tidier, quicker to change and less prone to stray strands.
Should I remove the jumpers on bi-wire terminals?
Only if you’re bi-wiring or bi-amping. For a standard single-wire connection, leave the jumpers installed.
Related guides: What amplifier do I need? · How to hide speaker wire · Amplifier compatibility checker

Leave a Reply